Single Phase Motor Windings
Time to review establishing the “which is which” when it comes to single phase motor windings. Often you will find a motor that has no wiring diagram, just 3 wires sitting in the connection box. Now it is up to you to find your start and run windings to get this motor hooked up.
Let’s Test
Just a reminder before you start testing:
Do your complete motor test before you even consider hooking up this motor. In other words, do your mechanical checks, test the insulation resistance etc. Only if this motor is in good condition, proceed to find your respective windings and connect it to power.
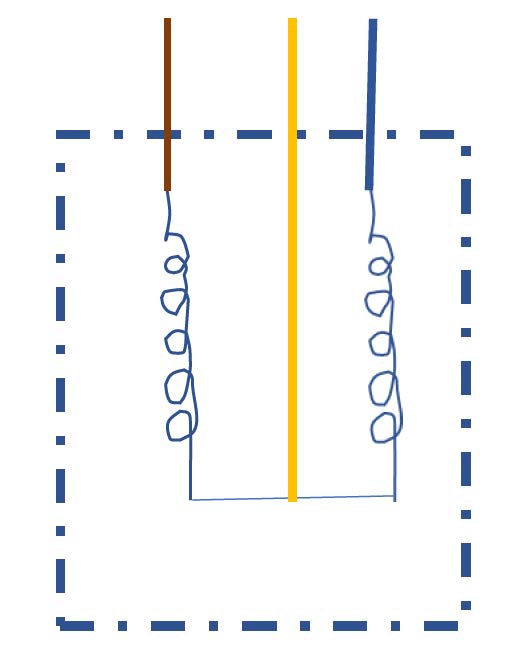
Let’s test the windings then. For the above diagram I have just picked random colours for the leads that you will find in the terminal box, but the test procedure is the same whatever the colours.
For our diagram then:
Test resistance between Brown and Yellow. Let’s say you get a resistance of 5 Ohm
Test Resistance between Brown and Blue. This time you get a reading of 8 Ohm
Test resistance between Yellow and Blue. You get a reading of 3 Ohm
Understanding the Readings
This is where we tend to rush things and make mistakes. We know that the start winding has the highest resistance and the run winding the lowest. Don’t get tricked by the values of 8 and 5 ohm here!
Your start winding is the 5 ohm and the run winding the 3 ohm. the value of 8 ohm was what you got testing across both windings!
To sum it up (no pun intended), the sum of the run and start winding is where the 8 ohm comes from.
That means the Yellow is the common between the two and that is what you will connect the Neutral to. Brown is the start and will go the the one side of your Capacitor. The other side of the Capacitor and the Blue goes to your Active (Live). Job done and ready to run.
Last but not least – Remember to stay safe out there! Avoid the temptation of taking a shortcut, it is not worth it.
Ps. remember to take a look at the toolshop:)